Loading...
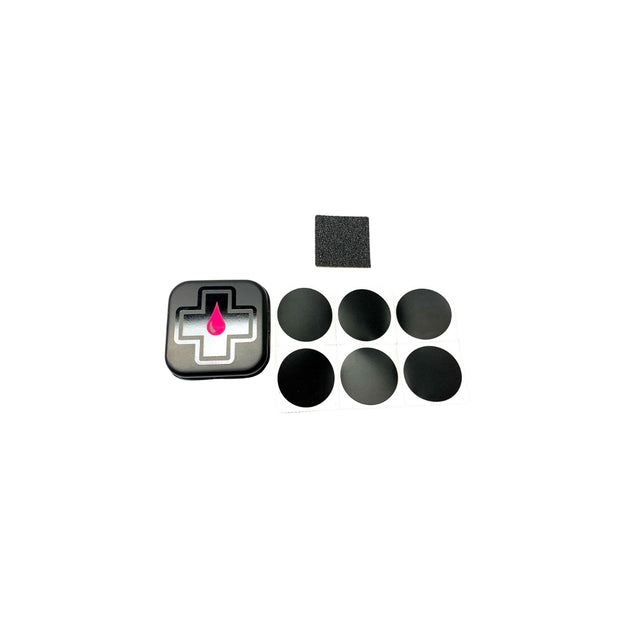
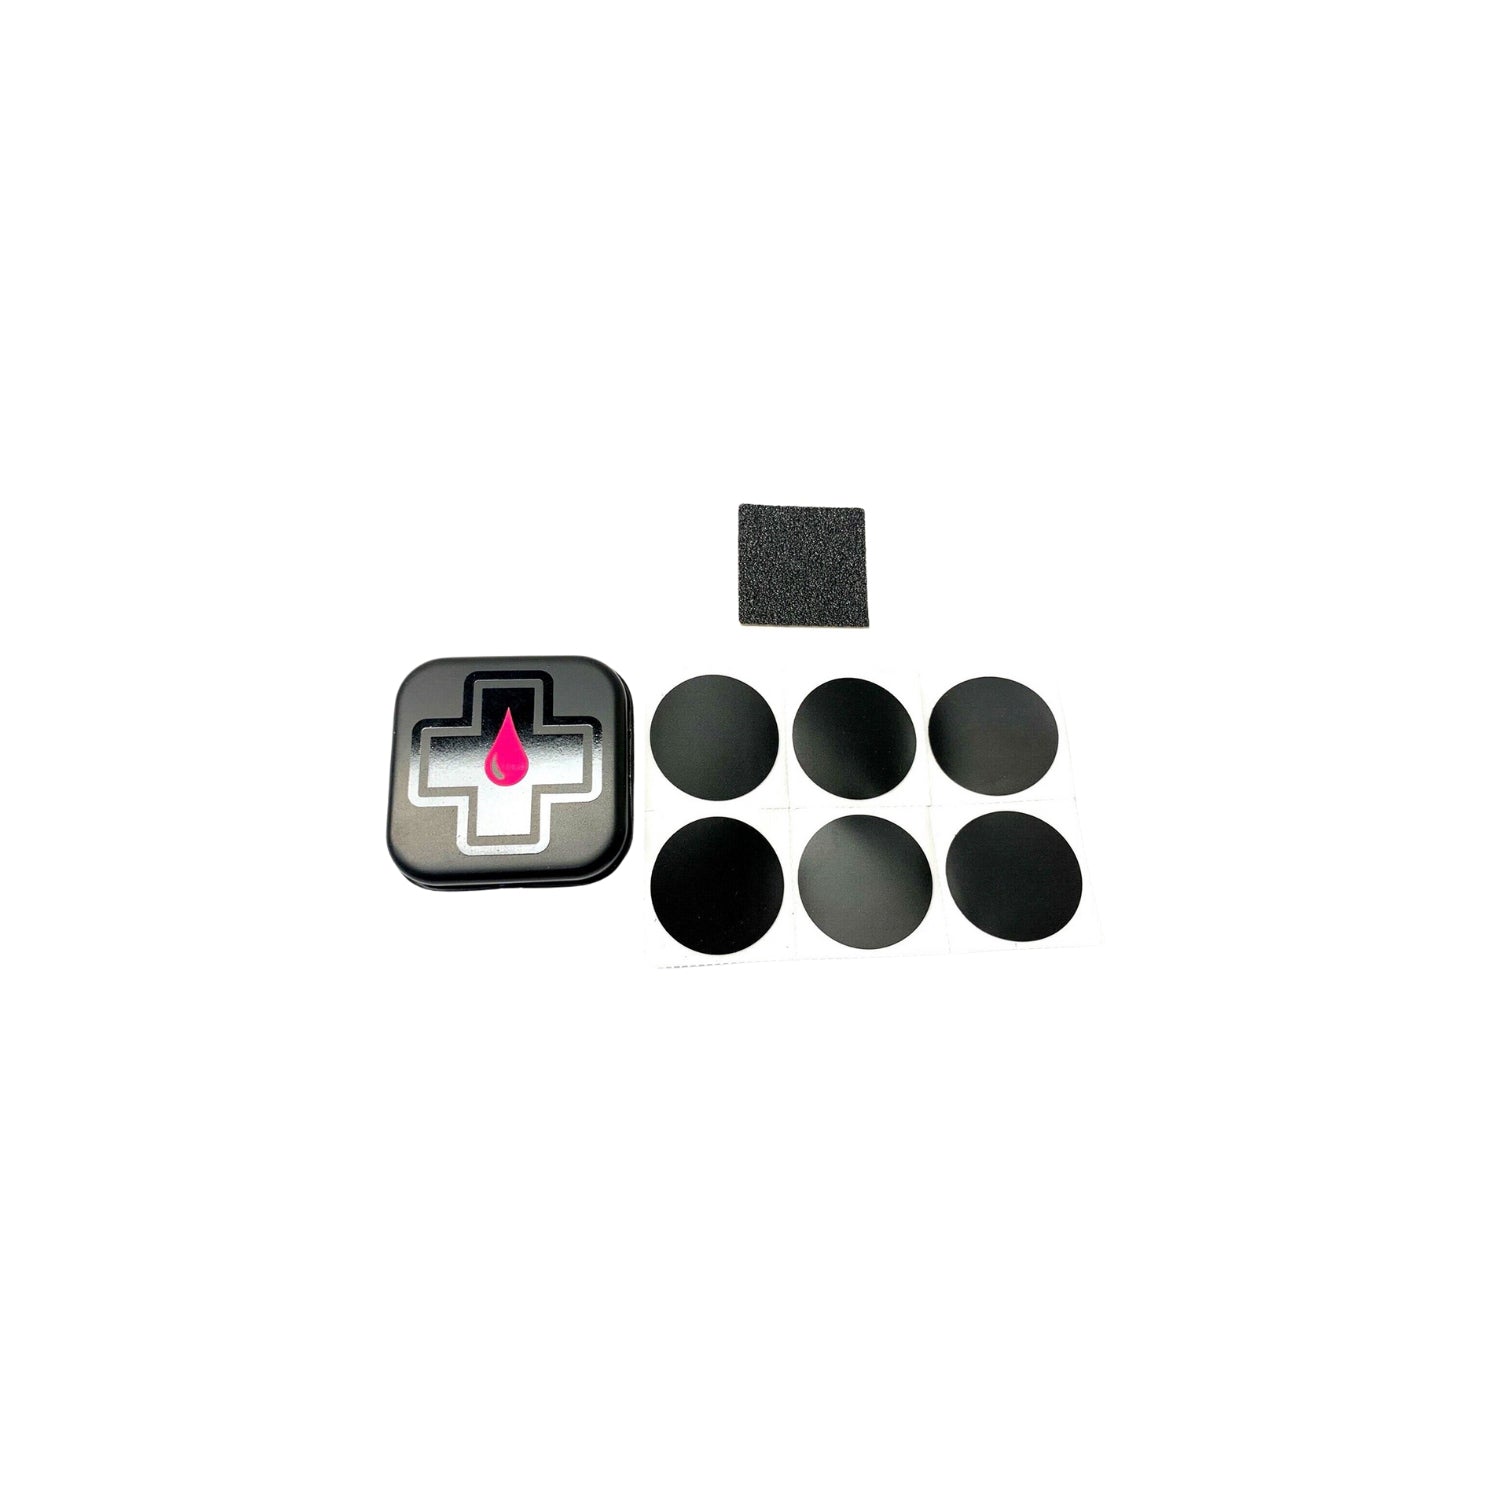
Muc-Off Glueless Patch Kit
Muc-Off | SKU:
5037835200409
Regular price
AED 28.57
Unit price
/
Unavailable
Split in 4 interest-free payments of AED 7.14 with  or
or 
SEE IT IN ACTION
Don't let a puncture bring your ride to a standstill. Available in a handy travel-sized pouch it can be kept in a jersey pocket or pannier bag, including everything you need to get you rolling again.
FEATURES:
- 1x Sand Paper
- 6x Glueless Patches (25mm)
- Travel Size - Can be kept inside a jersey pocket, tool bottle or saddle bag
DIRECTIONS:
- Step 1 - Try to keep the area free of dirt and debris during the whole procedure.
- Step 2 - Sand down the punctured area on the inner tube, then pump a little air into the inner tube to give it shape, but not too much that it stretches out.
- Step 3 - old a clean finger over the hole to prevent too much air from escaping, peel off a patch and place it so the puncture is in the centre.
- Step 4 - starting from the centre, press down firmly, working your way out to the sides.
- Step 5 - repeat to ensure a strong bond is achieved.
- Step 6 - re-fit the inner tube inside your tyre and inflate to the specified PSI.